Showing posts with label Gimp. Show all posts

Tuesday, October 29, 2013

GIMP for digitalization of sketches

GIMP is a very powerful graphics software. I use it for 95% of my graphics work. In this article i will show how to digitalize a sketch. I discovered this method when i wanted a digital pen to work. So decided to use raw sketches since they are natural and powerful way of sketching what we have in our mind. Also i always prefer doing natural way to work, being away from screen whenever possible. I am also in favor of saving power so try to utilize methods which are not dependent on electricity.

Things and skills needed:
  • My setup is: ArtistX Linux (modified Ubuntu). Acer e-cmachin EMD-644 AMD APU
    powered laptop. It has less than 25 watts of power consumption.
  • GIMP 2.8 or above if available. 2.6 will also work.
  • Basics of GIMP.

Below are the methods in steps.

  • Take a picture of your sketch using good camera as clean as possible with big contrast ratio (means dark and bright should have higher difference).
  • To get good contrast use plain white paper and black ink.
  • To get regular, uniform surface try putting a glass panel over the paper. Make sure that reflection does not disturb the shot Or simply use a scanner if you have one.


Now the digitization process. To let this process success even in worse cases i am using low quality sketch in resource constraint state of work. This image is bit blurred and has thick pen. Still we will achieve our goal.


Start GIMP and load your sketch. Make a copy of original layer, set original invisible and locked. Work on copy.

Method #1:
  1. Click: Colors => Threshold => Move the slider to choose the best output you need.
  2. Try to remove noise/unwanted colors by using other options like Brightness-Contrast, Levels, Curves, Desaturate. Then try step 1 again.

Method #2:
  • Click Filters => Artistic => Photocopy.
  • Play with mask radius to get how much sketch ink you want in output.
  • Keep sharpness higher but its not a rule in every case.
  • Keep % black and % white higher to almost 100%. i.e. 1.0


Extra Methods for enhancement of output. Apply before using Methods 1 & 2:
  • Color => Auto => White balance, normalize, Stretch contrast, HSV.
  • Color => Color to Alpha => Select the color of paper. Find color of paper using color picker.
  • Filters => Enhancement => Unsharp Mask. Play with radius and little bit of other options.
  • For some cases: Filters => Blur => Pixelize and unsharp mask (above) can be used in respective order to get nice results.


We should only rely on Extra methods to enhance the sketch to get best results from Methods 1 & 2. Below is the output of using above techniques.


I hope this helps in your sketch work. If it helped please say thanks to GIMP first :), its opensource and needs lots of support and funds. Least we can do is to make it grow!.


Download this tutorial in PDF format for offline use and printing:GIMP_for_digitalization_of_sketches.pdf.7z


Search TAGS:
How to convert sketch into digital image, convert paper into digital black and white format, sketch digitization, digitalization.


Monday, June 17, 2013

Making vector like smooth gradients in GIMP

I always wanted to know how graphics like angry birds, CutTheRope etc are made then i came to know about Inkscape, vector arts. But i want to master few software instead of learning 100s. So i wanted to achieve the same in GIMP.

Except shape editing i find GIMP robust for most of my needs, so i surrendered using Inkscape. I use Inkscape for making shapes mostly. Now GIMP does all my job :).

I have written a simple short tutorial to do smooth gradients often found in vector graphics. This tutorial will give you some simple but powerful tips how to choose colors and opacity to play with smooth color gradients.


Below is the download link of the tutorial in PDF format for offline use:
GIMP_smooth_vector_like_gradients.pdf.7z

Or online version below:


Requirements:
  1. GIMP 2.8 is recommended, otherwise 2.6 if 2.8 is not available.
  2. Some basic knowledge of PC and graphics terms like alpha, hue, saturation etc
  3. Basic usage of GIMP or other app with layers.

The only tools and settings we will use most:
  1. Airbrush tool, opacity & size of brush.
  2. HSV instead of RGB colors,


Steps:
  1. Create new project 640x480 or above resolution with transparent background.
  2. Fill background with dark green color. [ HSV = 124, 99, 63 ]
  3. Select Airbrush tool with size = 20, opacity = 100, same above green foreground color.
  4. Select brush blurred circle, size = 51x51, Hardness 075.
  5. Create new layer and click it to make active work layer.


Things to note:
We have the same green color which will not produce any effect on the background color then why we picked it?

Because we want to use HSV which allows us great color match & closer difference in surrounding colors using Saturation & Value (lightness).

Notations:
H = Hue, S = Saturation, V = Value (lightness), O= Opacity, Sz = Size,

Back to steps:
  1. Now click the FG color box to change the color of our brush.

  2. Look at the color formats available: H, S, V, R, G, B. We will always use HSV not RGB because altering RGB values changes colors undesired way.
  3. Now we can move V slider to change darkness/lightness of a color and S slider to change the color strength. H values for choosing different colors.
  4. We will select V = 40.
  5. Now draw an irregular line (L1) in the blank layer. Now set V = 30.
  6. Use “Fuzzy select tool” and select that irregular line. Click “Menu -> Select -> To Path”.
  7. Go to path tab near layers tab (dockable layers dialog), enable it with eye button at left. Switch to Layers tab and select path tool.
  8. Select the path and move it to above-right of the last selected irregular line. Use Move(alt) option in path tool to move path. Click selection from path. Hide path again.
  9. Now fill this selection with the airbrush. V = 40, O = 50, Sz = 30. The Mouse pointer should be over the top-right border of the selection so that middle of the selection fills lighter green color. Unselect all to remove selection. Now the lines should look like a walking path (L2).


  1. Now change Brush, V = 75, Sz = 50, O = 100. Draw below L1. Will give output like this -


  1. Using this method we can make a smooth color gradient just like we get in vector art apps like inkscape. But GIMP gives us much more powerful control.
  2. Below is final output of what i made while writing this tutorial using some objects i made separately. Viz -
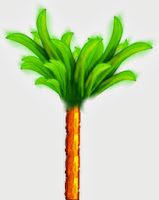
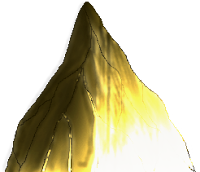


The water like thing at bottom of image was just made using MODE of layer color combination not any pen or brush.

You can try it: Make new layer above your green layer, make figures or anything, from mode select saturation, value, dodge etc whichever looks cool to you.

All these gfx were made using the method i described above. You have to play with V, S, O, Sz and brushes, Use Opacity to get lighter color instead of changing V every time.

There are lots of techniques to play with but one good trick of making quick graphics is to make bigger gfx using airbrush tool and downscale it then use pixel editing if desired.


Lets make a simple grass:
  1. Create a new project 640x480 with transparent background.
  2. Now create a grass like shape with closed boundaries so that we can fill it with green color.
  3. Now select the grass shape with Fuzzy select tool and click Menu => Select => Save to channel (keep important selections saved into channels). Get back to the layers tab and create a new layer. Keep selection active!

NOTE:
Always try to keep outlines in separate layer to keep it unaltered and pick selections from them and work on new layers. It means select something in a layer using selection tools and create new layers and do editing on them. This is important so that any editing we do shouldn't spread outside of the boundaries ( the outline ) of our target object and our outlines remain available as it is.

  1. Now fill this new layer with green color with your choice of SV values .
  2. Now select Airbrush tool, choose a darker value and apply shade on left of the grass.
  3. It is important that you shade color in gradient way, means left to right => dark to light. To achieve this try not to change V, just reduce opacity to draw less darker towards right.
  4. The above shade means grass has some light source at right side. Without shading grass will be plain single color filled paint. Can you image what shade objects have at night/dark? Of course nothing but black, That is why keep smarter shading assuming all light sources including the color mixing due to nearby objects. Suppose a blue orb a left, then apply little blue reflective shading at left to produce more realistic output.

NOTE:
Lots of paintings fail due to bad shading, we should never apply anything without planning. While working always think this in such cases, why i am doing this? Even a single pixel can produce bad shade if added randomly.


  1. Now select higher V, means lighter green and apply to right side of grass. Just as done above. Below are the snap of all steps done yet -


  1. Now select white, but!, in HSV white means V=100, S=0. Apply some white shade randomly where we assume direct light reflection. Adjust opacity to keep white level as per requirements.
  2. Remove the black outline and your grass is ready.

This result may or may not be up to your expectations. But the shading methods mentioned above will result in your desired one depending upon efforts made.


Impact of nearby objects:
Colors mix together, here Blue + Green = Cyan, therefore to let shading take practical color create new layer and apply shading with the object (blue here). The layout is blue shade layer above and the target object is below (grass here). Click blue shade layer and select MODE to “Addition”. This will add blue with the bottom layer i.e. green to automaticaly produce cyan.


TIP:Always reuse your work if possible. Using color, size variations of images.
- GIMP rocks :) -


GIMP TIP:
To master GIMP one has to become a player in Selection, selection modifications, path, and color selection. Above tutorial has a little demo of this all. Lots of things are there depending upon your needs. But instead of depending too much on filters try to make things yourself otherwise you probably will loose mastering art!

Sunday, June 16, 2013

Using GIMP for learning and working with Pixel-Art

I have been using gimp for pixel-art and it works great with almost everything i needed for pixel-art. Even more than that!

I have written a tutorial how gimp can be used for pixel-art with some techniques to enhance pixel-art work.

Please download the tutorial in PDF format for offline use:

GIMP_for_pixel_art.pdf.7z


Or online version below:


Setup GIMP for pixelart work
  1. Start GIMP ( v2.8 recommended )
  2. Create new project 32x32 with background transparent.
  3. Zoom-in till the working canvas gets screen-fit size.
  4. Select pencil tool with black foreground color (default).
  5. Choose any brush which doesn't has blur. Simply select the black circle without blur.
  6. Now set brush size to 1 pixel in GIMP 2.8 OR minimum scale in GIMP 2.6.


Now the above steps have made a pixel art environment in GIMP.

Setup color palettes
  1. Go to any of your favorite TAB ( layers tab at right is recommended ) and click [<| ] button which shows tooltip “configure this tab”. See following image:


  1. Click -> Add Tab -> Palettes. Same way add FG/BG color


TIPS:
  1. Always work in Greyscale using Greys (32) palette. Click this palette then switch to FG/BG Tab pane. You will get black to white color in order.
  2. Why greyscale only? Its because realism doesn't reside in colors but number of colors. Doesn't a black & White image look real? It does. Therefore work in greyscale without caring colors just focus on shading and dithering then after completion give colors using fills or “select by color tool”.
  3. Instead of selecting darker OR lighter color from color chooser just change the Opacity of the selected color. E.g. Use black color over lighter backgrounds with varying opacity to get desired black/grey color.
  4. Another fast way of getting similar colors to image is to pick colors from the image itself using “color picker tool”.
  5. To get dispersed pixel like spray set “Apply Jitter” checked with desired value.


How to get pixelart samples?
This can be done easily using GIMP. Following steps will let you get loads of pixelarts from images/wallpapers we have.

  1. Import/Open any camera picture in GIMP.
  2. Resize to acceptable size so that image becomes pixelated but clearly recognisable.
  3. Now click in menu Image => Mode => Indexed => Generate Optimum palette with maximum 256 colors.
  4. This will reduce total colors used by the image. This can make image low-colored but this is exactly what we wanted. Because most of pixelart is done with 256 colors only.
  5. Now look at the parts of image how the pixels are organised :)


NOTE:
Indexed image will not offer flexible alpha values, only visible OR invisible pixel are there. To edit indexed image convert it back into RGB format.


Few pixarts i made in GIMP :


Saturday, April 28, 2012

Gimp Script for exporting positions of all the layers.

Gimp Script for exporting positions of all the layers.


I have created a Python script which can export layer positions in a text file.

Usability:
Are you using GIMP for creating maps for your game? You want to create a 1024x768 map and put objects in it but cannot export the positions? This script can help you get the positions of your objects.

Procedure:
  1. Run GIMP and create a desired resolution image.
  2. Drag and add your object's images in gimp.
  3. Ensure that you crop the layers so that extra alpha (transparent) areas are not remained in objects.
  4. Duplicate the objects to the numbers you want and place them to positions you want.
  5.  Do same with other objects, backgrounds.
  6. Now export their positions. Filters -> Positioning -> Layers Position Dumper
  7. Put the file name with full path in next dialog. e.g. ~/my_game_map.txt in Linux Or c:\my_game_map.txt in windows. Click Ok.
  8. Now you can check the exported file which contains the positions of all the layers.

How to install the plug-in?
Firstly ensure that you have Python installed in your system. Try to install gimp until you see option of "GIMP python plugin" options checked while installation.

If you haven't installed it please install these packages, This is my installer package: gimp-2.6.11-i686-setup, python-2.5.2.msi

However you can download individual packages by google
gtk-2.12.9-win32-1.exe, pycairo-1.4.12-1.win32-py2.5.exe, pygobject-2.14.1-1.win32-py2.5.exe, pygtk-2.12.1-2.win32-py2.5.exe, python-2.5.2.msi


Or follow this page:
http://www.gimpusers.com/tutorials/install-python-for-gimp-2-6-windows


Install the plugin
Copy the python script to:
WIndows: C:\Documents and Settings\USER\.gimp-2.6\plug-ins
Linux: ~/.gimp-2.6/plug-ins
and restart gimp.

Verify that you have gimp python plugins enabled by following these steps:
Filters -> Python-Fu -> Console

type this:
>>> import gimpfu
>>> gimp.version
(2, 6, 11)


Sample exported file:


Format RATIONAL:
"layer name" X%-Pos Y%-Pos %Width %Height

Format PIXEL:
"layer name" X-Pos Y-Pos Width Height

RATIONAL: "Frame 1.png" 0.000000 0.000000 26.756757 94.634146
PIXEL:    "Frame 1.png" 0.000000 0.000000 99.000000 194.000000

RATIONAL: "Frame 2.png" 26.756757 0.000000 18.918919 99.512195
PIXEL:    "Frame 2.png" 99.000000 0.000000 70.000000 204.000000

RATIONAL: "Frame 3.png" 45.675676 0.000000 25.675676 98.048780
PIXEL:    "Frame 3.png" 169.000000 0.000000 95.000000 201.000000

RATIONAL: "Frame 5.png" 71.351351 0.000000 28.108108 97.073171
PIXEL:    "Frame 5.png" 264.000000 0.000000 104.000000 199.000000

... more dump stripped off


Download:
layer-position-dumper.7z (GIMP v2.6 & 2.8 both )

Raw code:


#!/usr/bin/env python

from gimpfu import *

gettext.install("gimp20-python", gimp.locale_directory, unicode=True)

def layer_position_dumper(img, drawable, filename):
out = file( filename,"w")
out.write( 'Developed by Bindesh Kumar Singh on 26 April 2012\n')
out.write( 'This Plugin is a utility of Greh Game Engine (C) 2009-2012\n')
out.write( 'It dumps the positions of all the layers in a specified text file\n\n')
out.write( 'Format RATIONAL:\n"layer name" X%-Pos Y%-Pos %Width %Height\n\n' )
out.write( 'Format PIXEL:\n"layer name" X-Pos Y-Pos Width Height\n\n\n\n' )
count = 0
w = float( img.width )
h = float( img.height )
for l in img.layers:
if 1 == pdb.gimp_item_is_group( l ):
#print 'group hai'
for gl in l.layers:
x = float( gl.offsets[0] ) * 100.0
y = float( gl.offsets[1] ) * 100.0
lw = float( gl.width ) * 100.0
lh = float( gl.height ) * 100.0
out.write( 'RATIONAL: "%s" %f %f %f %f\n' % ( gl.name, x / w, y / h, lw / w, lh / h ) )
out.write( 'PIXEL:    "%s" %f %f %f %f\n\n' % ( gl.name, gl.offsets[0], gl.offsets[1], gl.width, gl.height ) )
count += 1
else:
#print 'group nahin hai'
x = float( l.offsets[0] ) * 100.0
y = float( l.offsets[1] ) * 100.0
lw = float( l.width ) * 100.0
lh = float( l.height ) * 100.0
out.write( 'RATIONAL: "%s" %f %f %f %f\n' % ( l.name, x / w, y / h, lw / w, lh / h ) )
out.write( 'PIXEL:    "%s" %f %f %f %f\n\n' % ( l.name, l.offsets[0], l.offsets[1], l.width, l.height ) )
count += 1
out.close()


register(
"layer_position_dumper",
"Dump positions of the layers",
"Dumps the offsets/positions of all the layer in a specified file",
"Bindesh Kumar Singh",
"Developed for GrehGameEngine",
"2012",
"_Layers Position Dumper",
"RGB*, GRAY*",
[(PF_IMAGE, "image",       "Input image", None), (PF_DRAWABLE, "drawable", "Input drawable", None), (PF_STRING, "name",       _("_File name with full path"), _("layer_positions.txt"))],
[],
layer_position_dumper,
menu="/Filters/Positioning",
domain=("gimp20-python", gimp.locale_directory)
)

main()


[ 2.8 is currently limited in recursions of groups inside groups. ]

Search tags:
gimp export layer positions, export positions of layers in gim, gimp layer position dumper plugin.

Monday, May 30, 2011

A very good collection of GIMP tutorials.

I found this page while searching for gimp tutorials, this page contains many of tutorials you will find by googling.

Wednesday, September 1, 2010

Lots of free Gimp Brushes.

Main site:

I am using all those brushes which are royalty free in my artwork and game development.
Please visit these sites and download these nice collection of brushes.

You should visit this site for good collection of gimp brushes and for free.
I love most of brushes. Grab them now:

http://hawksmont.com/blog/category/graphic_design/resources/gimp_brushes/